Tomatoes in August cost almost nothing. Tomatoes in February cost plenty and taste like the box they travelled in. Drying closes that gap. Pull the water out of a glut of produce and the same fruit or vegetable that would have gone soft in a fortnight sits quietly in a jar for a year or more — and shrinks to a fraction of its bulk. A whole tray of apple slices fits in a jam jar. Here is how to do it properly, from picking equipment to getting those leathery slices back into a stew.
Why Dehydration Earns Its Shelf Space
Mould, yeast and bacteria need moisture to grow. Dry a food enough and you take that moisture away, so spoilage organisms stall. The food is not sterile, and it is not immune to time — it is simply stable, provided it stays dry. Fat can still go rancid, colours fade in light, and flavours flatten over years, but a well-dried jar of peppers or mushrooms is genuinely useful pantry stock rather than a science experiment.
Water content decides what works. Mushrooms, onions, garlic, tomatoes, peppers, courgettes, apples, pears, berries, plums and every herb you can name dry beautifully. Lettuce, cucumber and watermelon do not — they are mostly water and collapse into nothing. Root vegetables and beans need a quick blanch first. Drying also concentrates flavour: a handful of dried tomato in a winter sauce tastes far more like summer than a fresh supermarket one does.
Choosing a Method That Fits Your Kitchen
Electric dehydrator
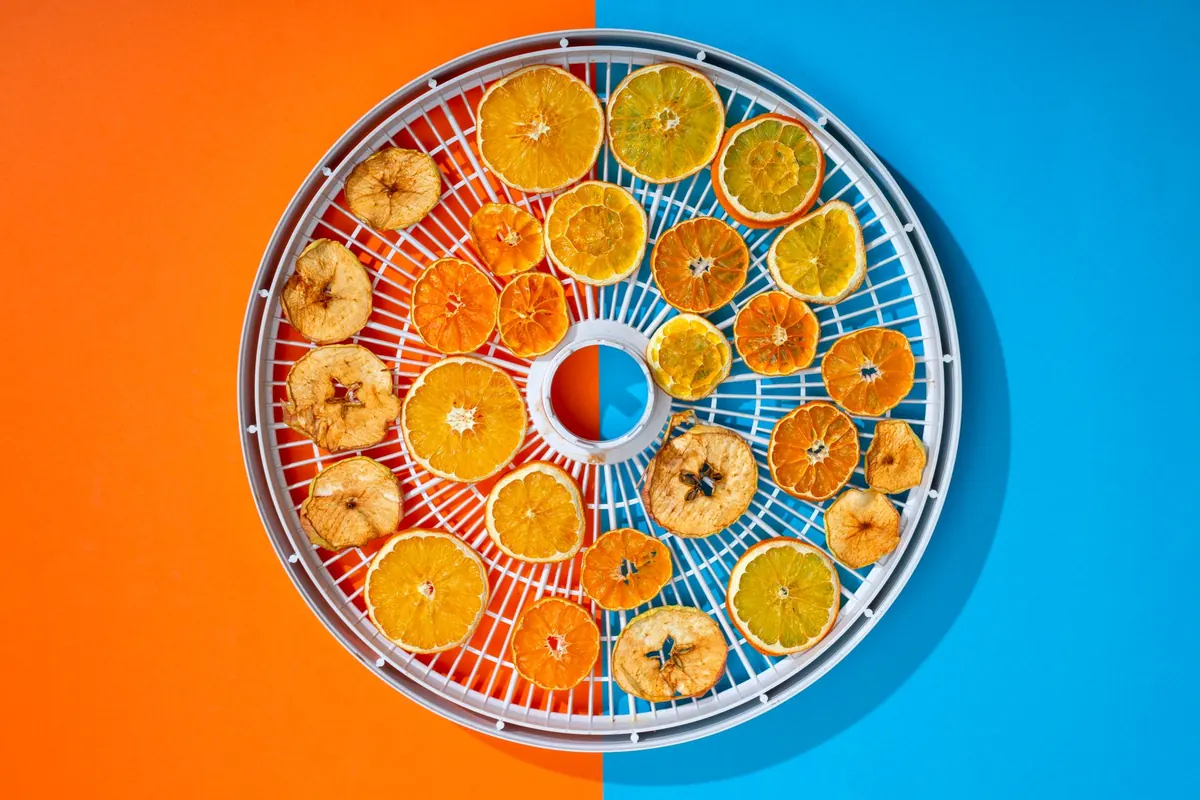
The easiest option. A fan pushes warm air across stacked trays at a steady 52–57°C (125–135°F), and you can run it overnight without thinking about it. Buy one with a thermostat if you can; on/off models dry unevenly and scorch the edges of thin slices. Round stackable models are cheap and work fine for small batches; box-style machines with square trays hold more and are simpler to load.
Oven
Workable, with caveats. Set the oven as low as it goes — often 60–90°C — and prop the door open a few centimetres with a wooden spoon so moisture escapes. A fan-assisted oven dries faster and more evenly. Expect to check it often, rotate trays, and accept that the process takes longer than a dehydrator and uses more energy.
Sun and open air
In a hot, dry, breezy climate this is the traditional method: produce on screens under a layer of cheesecloth, brought in at night to avoid dew. In a humid climate it mostly grows mould. If your summers are damp, skip it.
Some air fryers and multi-cookers now include a dehydrate setting. They are fine for a couple of trays of herbs or apple rings, less so for a season's worth of tomatoes.
Prep Work Decides the Outcome
Cut everything to an even thickness — 3–6mm for most fruit and vegetables. Uneven slices mean the thin ones turn to crisps while the thick ones stay damp in the middle, and a damp middle is what spoils a jar six months later. A mandoline is worth the cupboard space if you dry regularly.
Blanch vegetables such as carrots, green beans, peas and broccoli for two to three minutes in boiling water, then plunge them into cold water and pat dry. This slows the enzymes that cause browning and off flavours during storage. Fruits benefit from a dip in acidulated water — a good squeeze of lemon juice in a bowl of water — to keep apples and pears from going brown. Onions and garlic release fumes that will perfume your whole house; dry them in a garage, shed or on a balcony if you can.
The Drying Process, Step by Step
- Wash and dry the produce, and cut away bruises, soft spots and stems.
- Slice evenly, then blanch or pretreat anything that needs it.
- Pat everything thoroughly dry — surface water only lengthens the process.
- Lay pieces in a single layer, not touching, with gaps for air to move between them.
- Set the temperature: 52–57°C for fruit and vegetables, 35–45°C for herbs, which scorch easily.
- Rotate trays and swap their positions every couple of hours, since the top and the edges always dry first.
- Start checking at the early end of the expected time. Tomatoes may take 8–12 hours; mushrooms 6–10; apple slices 6–10; herbs 2–4.
Judging Dryness, Conditioning, and Safety
Under-drying is the commonest mistake, so test properly rather than by look alone.
- Fruit should be leathery and pliable, with no sticky pockets. Cut a piece open — there should be no beads of moisture inside.
- Vegetables should be brittle enough to snap, not bend.
- Herbs should crumble between your fingers.
Then condition the batch. Pack it loosely into a glass jar, leave the lid on for a week, and shake it daily. If moisture fogs the glass or the pieces feel soft again, the drying was not finished — put them back in the dryer. This step catches the one wet slice that would otherwise ruin the jar.
If you ever find mould, discard the whole batch. Scraping it off is not enough; mould can leave behind compounds that survive and spread invisible threads through the food. Do not taste a suspect jar to check. Store dried goods in a cool, dark, dry cupboard, and be careful with oils: dried garlic or herbs packed in oil create the low-oxygen conditions that allow dangerous bacteria to grow, so keep any such oils in the fridge and use them within a few days. If you are preserving for someone with a weakened immune system, or you want guidance on specific foods, check a reputable home-preservation resource or your local extension service before committing a season's harvest.
Storing and Rehydrating Your Stores
Storing
Glass jars with tight-fitting lids are ideal — you can see the contents and spot condensation immediately. Vacuum-sealed bags and mylar pouches with oxygen absorbers suit longer storage and awkward shapes. Label everything with the contents and the date, and keep the jars away from the stove and any sunny windowsill. Check new batches monthly for the first few months.
Rehydrating
Cover dried vegetables with hot water or stock — roughly one part food to one part liquid — and leave them for 20 to 30 minutes for thin slices, an hour or more for chunky pieces. Mushrooms take about 20 minutes. Use the soaking liquid in the dish if it tastes good; it carries a lot of flavour. For soups, stews and sauces you can often drop dried vegetables straight into the pot and let the cooking do the work. Fruit rehydrates well in warm water or juice, and for baking it is usually worth soaking and draining first so the batter does not turn wet. Some things need no soaking at all: dried tomato slices in oil, apple rings, and berry leather eaten as they are.
Start With One Tray
Pick the thing you have too much of — the courgette glut, the punnet of mushrooms going soft in the fridge — and dry a single batch. Label it, then cook with it within a month so you learn how it behaves in your usual recipes. Once you know how much a jar holds and how the texture comes back, scale up. A well-stocked pantry is built one tray at a time, not in a single weekend.
Photo: Valentin Ivantsov / Pexels